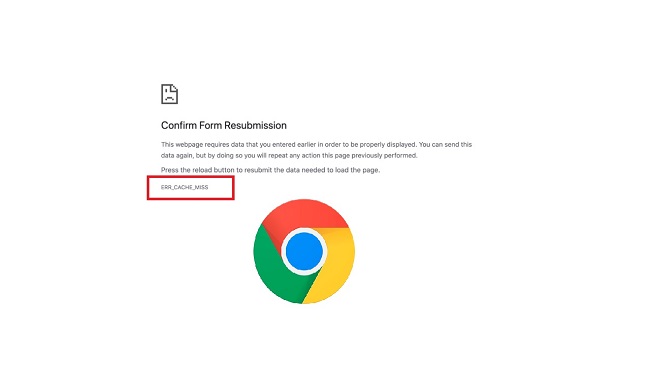
On today’s world, everyone works in a browser. As a result, we can see a lot of difficulties with browsers nowadays. The ERR_CACHE_MISS error is one of the most prevalent errors that many people encounter.
In this article, we’ll go over how to fix the ERR_CACHE_MISS problem using the seven methods listed below.

Contents
What is the ‘ERR_CACHE_MISS’ Error?
The ‘ERR_CACHE_MISS’ error is a common issue encountered by Google Chrome users. This error typically appears when users are trying to access a webpage or while using web applications.
The message accompanying the error usually reads, “Confirm Form Resubmission (ERR_CACHE_MISS),” indicating a problem related to the browser’s caching system.
Read Also:
- Where Do Snips Go Windows 10
- Service Host Local System
- Windows Can’t Communicate With The Device Or Resource
Causes of the ‘ERR_CACHE_MISS’ Error
Understanding the causes of the ‘ERR_CACHE_MISS’ error is crucial for effective troubleshooting. The primary reasons include:
- Browser Caching Issues: Chrome stores cached versions of webpages to load them faster on subsequent visits. If there’s a mismatch or corruption in the cache, it can lead to this error.
- Incorrect Browser Settings: Sometimes, inappropriate or misconfigured browser settings can trigger the ‘ERR_CACHE_MISS’ error.
- Faulty Extensions or Add-ons: Certain Chrome extensions or add-ons can interfere with the normal functioning of the browser, leading to various errors, including ‘ERR_CACHE_MISS’.
- Development-Related Errors: This error is common among web developers, particularly when testing forms or applications. Errors in coding or improper requests can result in ‘ERR_CACHE_MISS’.
How to Fix Chrome’s ERR_CACHE_MISS Error
If you encounter this error, don’t panic; by following the procedures below, you can resolve the problem. Cache difficulties are the primary cause of this error. We can tell by looking at the error name.
Method 1: Reload the Page
It’s a straightforward and safe procedure. First and foremost, we must ensure that the network connections are operational.
Because this problem can be caused by a lack of connectivity. We can verify that the network connections are operational. To do so, we must reload the page.
We may ensure that the network connections are working properly by reloading it. After using this method, if the problem persists due to connectivity concerns, it can be resolved.
Even after the problem appears on your screen, you attempt to remedy it using the methods listed below.
Method 2: Delete the Browser’s Data
We use our browsers and surf the internet on a daily basis. Occasionally, an undesired download operation begins, and we must cancel it. It is possible that such behaviour will result in the creation of corrupted files and cache.
The problem can be resolved by clearing the browser’s data. The methods below will show you how to clear the browser’s data.
Step 1: First, go to the top right corner of your browser and select the three vertical dots.
Step 2: Select the other tools and then click Clear Browsing Data.
Step 3: If you’re using Windows, you may also utilise the Ctrl + Shift + Del shortcut.
Step 4: The next step is to select Advanced from the menu, which has two options: Basic and Advanced.
Step 5: After that, Clear data after selecting the Time range.
Finally, restart the browser; this procedure works when corrupted files are the source of the problem. If the problem remains unsolved, try some of the other options.
Method 3: Disable the Extensions
Extensions are programmes that we can install on our browsers to make our job more convenient and efficient.
However, it later causes issues, such as some web pages failing to load because the extensions have banned them.
As a result, you must disable some extensions to determine whether extensions are the cause of an error.
To do so, take the following steps –
Step 1: On your browser, tap the three vertical dots. It’s in the upper right corner.
Step 2: Next, go to More tools and then to Select the
Step 3: If any extensions are visible, deactivate them all.
Step 4: Now you can start your browser.
When Extensions is the cause of the problem, after finishing this technique, the fault is resolved. Despite this, the issue persists. Don’t worry; try some of the other options.
Method 4: Use the Command Window to Reset the Network
ERR_CACHE_MISS errors are caused by problems with network settings. It can be fixed by resetting your network to default settings.
Using the command window, follow these instructions to restore your network settings to their default state.
Step 1: Type CMD into the Run window to open a command window.
Step 2: Then, as an administrator, run the command window.
Step 3: Then, without making any mistakes, type the following commands one by one –
ipconfig/release
ipconfig/all
ipconfig/flushdns
ipconfig/renew
set dns netsh int ip
reset winsock netsh
Step 4: Restart your computer now. The network settings are reset to the factory defaults.
If a problem is caused by network settings, the error will never appear on your screen. Even if you have the same mistake, you can move along and attempt the other alternatives.
Method 5: Disable the Web Browser’s Cache
Disabling the cache option will help you avoid the ERR_CACHE_MISS issue. As a result, you must disable cache on your Chrome browser in order to use this method. To do so, follow the steps outlined below.
Step 1: Open Google Chrome’s advanced settings by pressing Ctrl + Shift + I.
Step 2: Uncheck the item that says “disable cache.”
Step 3: Restart your browser after that.
This strategy assists the majority of people in resolving their problem. This strategy, I believe, will also assist you in resolving the problem. Even if the issue continues to be a problem, attempt the next method.
Method 6: Using DevTools [Developer Tools]
It’s not difficult to solve this problem with Developer Tools. DevTools is a programme that includes browser and webpage code. In order to do so, we must first select the cache and then clear it.
Step 1: Go to Developer Tool by pressing Ctrl + Shift + I.
Step 2: Next, choose the file from which you wish to clear the data.
Step 3: To clear the data, select clear.
Step 4: After using this procedure, you should be able to clear certain cache files that were causing you problems.
If the problem persists in your system, you can try the last option.
Method 7: Reset the Browser
We’ve exhausted all other options, therefore there’s nothing further we can do. As a result, we must use this approach of resetting your browser to its factory settings. To do so, simply follow the steps below to reset your browser.
Step 1: On your browser, click the three vertical dots.
Step 2: Select Advanced Settings from the drop-down menu.
Step 3: Finally, choose Reset Settings.
Preventing the ‘ERR_CACHE_MISS’ Error
Prevention is always better than cure, especially when it comes to browser errors. To prevent the occurrence of the ‘ERR_CACHE_MISS’ error, consider the following tips:
- Regularly Clear Cache and Cookies: Make it a habit to clear your browser’s cache and cookies periodically.
- Keep Chrome Updated: Regularly check for and install any available Chrome updates.
- Use Reliable Extensions: Only install extensions from trusted developers and keep them updated.
- Be Cautious with Browser Settings: Avoid unnecessary tinkering with advanced browser settings unless you understand their implications.
Read Also:
Conclusion
After that, your browser will restart from the beginning. Typically, the seven procedures listed above will resolve an ERR_CACHE_MISS problem.


![How To Fix ‘Gmail Server Error 007’ [SOLVED] Gmail Server Error 007](https://easyoox.com/wp-content/uploads/2020/04/Gmail-Server-Error-007.png)