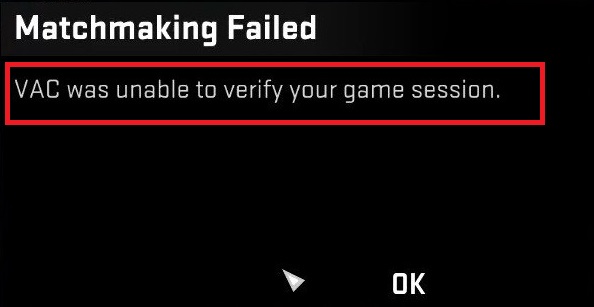
VAC is known as Valve Anti-Cheat as the name suggests, it is an anti-cheat software. Valve developed it as a component of the Steam platform for games such as Counter-Strike.
If it finds a cheat or modified installation files on a gamer’s system, it bans the user from the game for a definite period, since the day of detection, to prevent them from having undue advantages.
The software, however, sometimes returns positive for cheat even when there was none and results in ‘VAC was unable to verify the Game Session‘ error when the user tries to play online.
If you’re a victim of this error, here we discuss five ways to get rid of this error and return to the smooth functioning of the game.

Contents
What Does ‘VAC Was Unable to Verify the Game Session’ Mean?
VAC (Valve Anti-Cheat) is an automated system designed to detect cheats installed on users’ computers. If a user connects to a VAC-Secured server from a computer with identifiable cheats, the VAC system will ban the user from playing that game on VAC-Secured servers in the future.
The error message ‘VAC Was Unable to Verify the Game Session’ indicates that Steam was unable to verify the game’s files in the context of its anti-cheat system, which is essential for maintaining fair play.
Read Also:
- How To Make a Bucket in Minecraft
- How To Make a Fireplace in Minecraft
- Minecraft For Windows Incompatible With Launcher
Common Causes of the Error
Understanding the root causes of this error is vital for troubleshooting:
- Corrupted Game Files: If game files are missing or corrupted, VAC may not be able to verify them.
- Software Conflicts: Other software on your computer, including cheats, can interfere with VAC.
- Steam Account Issues: Problems with your Steam account, such as it being in bad standing, can also trigger this error.
- Outdated Game or Steam Client: An outdated game or Steam client can lead to a variety of issues, including VAC verification problems.
- Background Programs: Certain background programs might interfere with Steam and its VAC system.
How to Fix VAC was Unable to Verify the Game Session Error
Method 1: Log Out of Steam and Log in Again
Alteration of a configuration of some computer files by the operating system does contribute to this error. Since this may lead to the inability of VAC to identify and verify these files, it displays the ‘Unable to verify game session’ error.
If this is the case, you can simply get rid of this error by logging out and then again signing in. Since the configuration files are erased after you log out, this method is worth trying.
Step 1 – First, click on the Steam icon and run the Steam application.
Step 2 – Click on the ‘Log out of my account’ option in the drop-down menu after clicking on your profile. Now follow the instructions to log out.
Step 3 – Log in again with your credentials and see if the error has been resolved.
If the case is with the altered configuration of computer files, then reinstalling the game does not work since the configuration with the reinstalled application is the same. Therefore, you will need to log out and then in again.
Method 2: Just Reboot your Computer
Rebooting your computer helps when there is a clash between two applications trying to access or assess the same files, in this case, the file being the ones to be verified by the VAC software.
If due to the conflict between the two applications, VAC is denied access to the file to be verified, it returns the error, and the game is unable to continue.
To solve this issue, the best trick is to reboot your computer since it will terminate all applications running, such as the antivirus or the disk indexing service which could be causing the issue and hence eradicate the error.
Step 1 – Click on the Windows icon or press the Windows key on your keyboard.
Step 2 – Start menu appears and selects the power option.
Step 3 – After closing all applications, and saving their data, click on the reboot option to reboot your system. Hopefully, this should solve the problem.
Fix 3: Verify Integrity of Game Files
There is a chance that the error is displayed due to integrity issues with your game files. We can manually check if the error is displayed due to this particular issue. Follow the given steps to do so:
Step 1 – Start the Steam application by clicking on its desktop icon or from the Start menu.
Step 2 – In the library tab, there is a list of installed games.
Step 3 – The game that displays the VAC error, right-click on it, and select the properties option.
Step 4 – You will find an option that says ‘Verify integrity of game files’ in the local tab and click on it.
Step 5 – This will now automatically start verifying the integrity of your game files, which was displaying the error and will take some time. If there seems to be an issue with their integrity, the method will fix it, and the game will be up and running without any error. Once the verification is done, run the game to see if it returns the error again and if it does, you can try the next method.
Method 4: Repair the Steam Client
It isn’t always the fault of the game when the error is displayed without the presence of any modified cheat files. Sometimes it is the software itself that may have some corrupt or damaged files, which lead to displaying the ‘Unable to verify the game session’ error.
To get rid of this issue, you need to fix your Steam client.
Step 1 – Press Windows key + R to open the Run dialogue box.
Step 2 – Open command prompt by typing in cmd and hitting enter.
Step 3 – Type in the command ‘C:\Program Files (x86)\Steam\bin\SteamService.exe /repair’.
Step 4 – Check if the path to SteamService.exe in your computer, as mentioned in the above command. If not, type the command accordingly and then press enter.
Step 5 – Now, the files are repairing, and you need to wait for some time till the repair is complete.
Step 6 – After this, restart your computer and open the Steam application. Allow it to readjust by configuring and downloading any files necessary.
Step 7 – Now run the game that displayed the error. Lastly, see the issue has been resolved or not.
Fix 5: Exclude Game Directory from Antivirus Scan
We have already discussed the issue in the second method. There might be third party software trying to access your game files, the ones to be verified by your VAC software, interfering with it. Hence it causes the error.
In most cases, this software is the antivirus in your computers. The antivirus may try to scan the game directory in the background. Hence, it interferes with the VAC and causes the error. If this is the issue, simply avoid it.
Excluding the game directory and the Steam directory from the antivirus scan so that they are not scanned automatically. Since now the directories are not accessed by any other software, the VAC software should be able to read it without reporting any error.
Advanced Solutions
For persistent issues, consider the following advanced solutions:
- Refresh Steam Files:
- This involves re-downloading all the Steam files except your game files and user data. You can find detailed steps for this process on the Steam Support website.
- Reinstall the Game:
- Uninstalling and then reinstalling the game can rectify corrupted game files.
- Check for Malware:
- Run a full system scan to ensure that your system is free from malware, which could potentially interfere with Steam’s VAC system.
- Contact Steam Support:
- If the problem persists, reaching out to Steam Support can provide more personalized assistance.
Preventing Future Issues
To prevent future occurrences of the ‘VAC Was Unable to Verify the Game Session’ error:
- Regularly Update Software:
- Keep your games, Steam client, and operating system updated.
- Avoid Untrusted Software:
- Do not install untrusted or pirated software, which could interfere with VAC.
- Maintain a Clean Gaming Environment:
- Regularly check for and remove any software that might be flagged by VAC.
Read Also:
- How To Make a Bow in Minecraft
- How To Make Clay in Minecraft
- How To Make a Bubble Elevator in Minecraft
Conclusion
Out of the listed five methods, there is a high probability of resolving the error. At least one of these will get you rid of the ‘VAC Was Unable to Verify the Game Session‘ error. However, if the error still persists, there are plenty of more methods.
You can put it to use to eliminate this error. This error can be a direct result of the corrupt Steam client. So, you can try to restart your Steam Client to tackle this error. Most importantly, update your computer drivers.
We already know that corrupt or not up to date drivers can result in several errors. Hence we should not make an exception here either, and it is better to update the drivers first. This will let us know that the error was just a consequence of corrupt drivers.


